PART 2 - ROUNDTRIPPING FINAL CUT 10.4.5 AND DAVINCI RESOLVE 15
Once you finish color grading, it’s time to send your project back to Final Cut. It’s worth noting that this step isn’t always strictly necessary, since you can hypothetically export a final deliverable from Resolve. More often, however, you’ll want to send a high quality master of your video back to the NLE that you did your editing in, to add graphics, sound design, audio mastering and whatever else has been done outside of Resolve.
With that in mind, let’s take a look at a couple ways to do so.
The first step is to open up the Deliver tab at the bottom of Resolve:
This will open up the render settings window in the top left corner
Note: These tutorials don’t include any information about audio, since traditionally audio work isn’t done in Resolve. However, Resolve’s audio tools have been improved dramatically in recent versions, and some people think it may become feasible to do fairly advanced audio work in Resolve moving forward. With this in mind, audio importing and editing in Resolve will likely be covered in a future blog post
Exporting as a single clip:
Easily the simplest and most common way to approach this process is to export a single master file of your entire project, beginning to end. This is done by selecting Single clip under the render options.
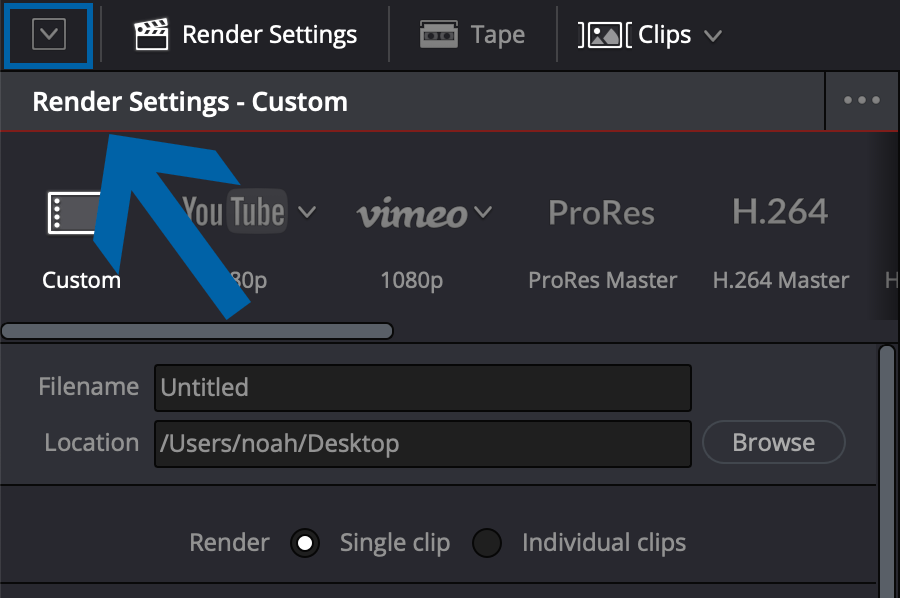
Pro Tip: The little arrow in the top left corner allows you to expand the Render Settings box to fill the full vertical length of the screen
The preset for ProRes Master is generally going to be pretty close to what you want, but I usually use custom settings anyway. Set the format to QuickTime and pick a codec. ProRes is almost always your best bet bet (422 HQ is usually plenty, but if you have the space, ProRes 4444 isn’t a bad idea either), but DNxHD is also a solid alternative if you need one.
Field rendering is for dealing with interlaced footage, and is especially important when it’s being scaled or rotated. For almost all modern applications, however, you’ll want to leave it disabled
Network optimization, according to the Resolve manual, “optimizes the resulting rendered media file so when it’s downloaded over a network, the portion of the file that’s been downloaded so far can be played before the entire file is finished downloading.” The pros and cons of this setting aren’t well documented, so I’ll have to leave this one up to your judgement. Feel free to leave a comment if you have any info on this
Set your frame rate and resolution to the appropriate values. The defaults for the advanced settings are generally pretty reliable, so it’s usually fine (And sometimes better) to leave them alone.
Switch over to the “File” tab and select a filename and destination for your project.
Again, the defaults are pretty reliable here, at least for a exporting a single master file, so go ahead and hit Add to Render Queue. Hit Start Render under the render queue on the right side of the screen (Don’t forget this step!) and your file should begin rendering to the location you picked
From here, all that’s left to do is import the graded master clip into FCPX and lay it over your old timeline, leaving the audio intact
Exporting as Individual Clips:
Sometimes, rather than exporting one large master file of your whole project, you may want to export each graded clip individually, and then reassemble them in your NLE using an offline and replace method or by re-importing an XML. While this is usually unnecessary, it’s good to know about for situations where you may need to make changes to a project after the grade is done. In some cases it may even be a good idea to render both.
Begin by switching the Render setting from Single clip to Individual clips. Under the Video tab, you now have the option to add frame handles. This is usually a good idea to include, though it can dramatically increase the render time and file size of your project.
Return to the File tab. The optimal settings here may vary from project to project, and you may even have your own preferences, but in general I use the Source name under the file naming options, and enable Preserve Source directory levels. These settings usually make reimporting or relinking media very straightforward.
From here, add it to the render queue and remember to hit Start Render (It’s very easy to forget this step).
Ultimately, Resolve’s render options have a lot of depth, so this tutorial will only take you so far. However, this is a good place to start learning and for most simple applications, this should be adequate. If you’re interested in learning more about Da Vinci Resolve, I highly recommend checking out the Resolve manual, which can be found here
Returning to Final Cut:
At this point, all that’s left to do is return to Final Cut, import your new master, and add sound and graphics to get it ready for delivery. As I said earlier, sometimes this will unnecessary as you can simply do your final export from Resolve, but it’s typically more common to return to your NLE for the final export.
Again, there’s not too much nuance to this step, generally you’re just going to import your new master file, open your old timeline and lay the new clip over everything else, leaving the old edit in place. You’re now ready to add mastered audio, music and graphics, and then to export the final version of your project


